
Adding an SPF record in GoDaddy is one of the most fundamental things you can do for your email. It’s a simple line of text that tells the world which servers are allowed to send email for your domain, essentially vouching for your own messages. Without it, you're leaving the door wide open for spoofing and telling receiving mail servers not to trust you.
Table of Contents
- Your Email's Journey and the Role of SPF
- Finding Your Way Through GoDaddy's DNS Settings
- How to Build a Flawless SPF Record
- Troubleshooting Common GoDaddy SPF Record Errors
- How to Know Your SPF Record Is Actually Working
- Common Questions After Setting Up Your GoDaddy SPF
Your Email's Journey and the Role of SPF
So, what actually happens after you hit "send"? Your email doesn't just teleport to the recipient. It goes on a journey, and almost immediately, it hits its first security checkpoint: the SPF check.
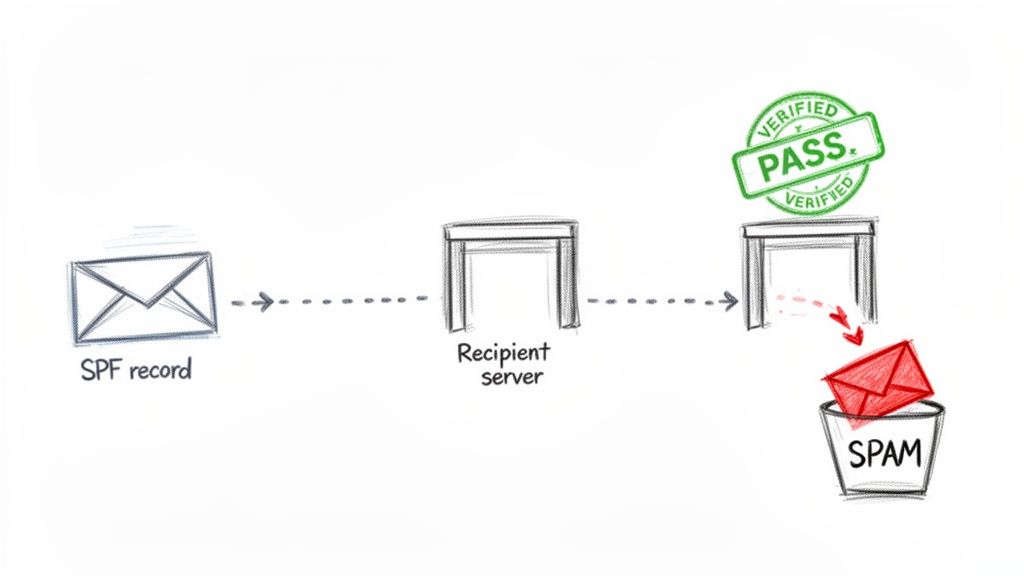
The receiving server acts like a bouncer at an exclusive club. When your email arrives, it checks the "from" address (your domain) and then looks up your domain's spf record godaddy settings to see if the sending server is on the guest list.
The Digital Passport Check
This record is basically your pre-approved list of all the services and servers you use to send email—like Google Workspace, Microsoft 365, or your CRM. The receiving server compares the IP address of the server that sent the email against this list.
- If it's a match: Perfect. The email is considered authentic and is waved through to the next checkpoint on its way to the inbox.
- If it's not a match: Red flag. The server gets suspicious, assumes the message might be a forgery, and will likely send it straight to spam or reject it entirely.
This one check is a cornerstone of your email sender reputation. Getting it right builds the trust you need for consistent delivery.
A correctly configured SPF record is not just a technical best practice; it's a business necessity. It's the difference between a sales proposal landing in front of a key decision-maker and disappearing into a spam folder without a trace.
The Real Business Impact of a Failed Check
I've seen firsthand how a missing or broken SPF record can cripple a business. The consequences aren't just theoretical; they hit your bottom line.
Imagine your marketing team spends a month and a small fortune preparing a major campaign. They hit "send" from their third-party email platform, but because that platform isn't in your GoDaddy SPF record, half the emails bounce. The campaign is a failure before it even has a chance.
Or think about the finance department sending a critical invoice. If the client's email server can't verify it's really from you, it might get flagged as a phishing attempt and junked. Now you're dealing with delayed payments and all the cash flow headaches that come with them.
An improper SPF setup broadcasts to every mail server on the planet, "My domain isn't secure, so you can't trust messages that claim to be from me." Over time, this erodes your domain's credibility, making it harder for any of your emails to get delivered. That one line of text in your DNS settings is a non-negotiable part of your entire email operation.
Finding Your Way Through GoDaddy's DNS Settings
Getting into your GoDaddy DNS settings for the first time can feel a little daunting. You’re faced with a dashboard full of technical terms, and the last thing you want to do is click the wrong thing and take your website offline. I get it.
But don’t worry, we’re going to walk through this together. Think of me as your guide, pointing you directly to the handful of fields you actually need to touch to manage your SPF record godaddy setup.

First things first, log into your GoDaddy account. Head over to "My Products" and click on the specific domain you need to configure. On the next screen, you'll see a "DNS" button or link—that's your destination. Clicking it takes you to the DNS management zone, which is the control panel for your domain's records.
This page is where you'll find a list of all the records currently set up for your domain: A, CNAME, MX, and, most importantly for us, TXT. Your SPF record is published as a TXT record.
Identifying and Editing Your SPF Record
Okay, now that you're in the right place, you need to find the specific TXT record that holds your SPF information. Scan the "Value" column for a record that starts with v=spf1. That's the one.
If you find an existing v=spf1 record, you'll just need to click the pencil icon next to it to edit. If you're setting this up from scratch and don't see one, you'll be clicking the "Add New Record" button instead.
Here's a common stumbling block: many people are surprised to find an SPF record already exists. GoDaddy often creates a default one automatically, especially if you're using their native email services. The goal is to edit this existing record, not to add a second one, which would invalidate your setup.
For example, if you use GoDaddy's Professional Email or Microsoft 365, your record will likely need to include their specific value: v=spf1 include:secureserver.net -all. It's also worth knowing that GoDaddy’s setup uses a return-path domain that won't align for DMARC on its own. This is a technical detail, but it means you absolutely need DKIM enabled to achieve full DMARC compliance. They also limit SPF records to 512 characters, so be mindful of that. For more on their specific requirements, you can always check out GoDaddy's official documentation on SPF records.
Understanding the DNS Record Fields
When you go to add or edit your SPF record godaddy entry, you’ll see a few form fields. They can look technical, but they're quite simple once you know what they mean.
- Type: This one is easy. For SPF, you always select TXT.
- Name: This tells GoDaddy which domain the record is for. For your main domain (like
yourbusiness.com), you'll just put the @ symbol in this field. It's a universal shortcut for the root domain itself. - Value: This is the heart of it all. The Value field is where you paste your actual SPF string—the text that starts with
v=spf1and lists your authorized senders. - TTL (Time to Live): This setting determines how long other servers should "remember" this record before checking for updates. GoDaddy's default is usually 1 Hour, and that's perfectly fine. You can just leave it as is.
So, for a typical setup on your primary domain, the final entry will look clean and simple.
| Field | Entry | Explanation |
|---|---|---|
| Type | TXT | The record type for all SPF configurations. |
| Name | @ | The shortcut for your root domain. |
| Value | v=spf1... |
The actual SPF rule authorizing your servers. |
| TTL | 1 Hour | The default cache duration set by GoDaddy. |
That’s it. By breaking it down field by field, the process becomes much more manageable. You're not just messing with settings; you're actively telling the internet who has permission to send email on behalf of your brand. Getting these four fields right is a huge step toward securing your domain and boosting your deliverability.
How to Build a Flawless SPF Record
Alright, let's get our hands dirty. Your SPF record is basically the bouncer for your email domain, checking IDs at the door and making sure only authorized senders get through. We're going to build that bouncer's list, piece by piece, so it's airtight.
Think of it this way: every service you use to send email—from your CRM to your marketing platform—needs to be on that list. If you're using GoDaddy for your primary email, include:secureserver.net is already your first VIP guest. But what about everyone else?
Identifying Your Sending Services
Before you touch a single setting in GoDaddy, you need to do a little detective work. You have to hunt down every single platform that sends email using your domain name. It’s amazing how many people miss one, and it can cause real headaches.
Go through your entire tech stack and look for:
- Email Marketing Platforms: The tools you use for newsletters and big campaigns.
- Customer Relationship Management (CRM) Systems: These often send automated emails to leads and clients.
- Transactional Email Services: Think password resets, order confirmations, and shipping alerts.
- Help Desk Software: If you have a
support@yourdomain.comaddress, that system needs to be on the list.
Forgetting even one of these is a common mistake that sends perfectly good emails straight to the spam folder. Once you’ve got your list, it's time to find the specific "plus-one" each service needs to get in.
Finding the Right SPF include Value
Every third-party service that sends mail for you will have a specific SPF value you need. This isn't something you guess—you have to get it directly from them. Dig into their help docs and search for terms like "Email Authentication," "Deliverability," or "SPF Setup."
You're looking for a small string of text that looks like include:servicename.com. This little piece of code is what delegates authority, telling any server that receives your email, "Hey, go check out servicename.com's rules, too. If the email came from them, it's legit."
A tip from the trenches: Don't just assume the
includevalue is the service's main domain. I've seen it a hundred times. The correct value is often something more specific, likeinclude:spf.theservice.netorinclude:_spf.theservice.io. Always copy the exact text from their official documentation.
Now for the most crucial step in crafting a flawless SPF record godaddy setup—merging all these pieces into one single, coherent record. For a deeper look at the mechanics, you can check out our full guide on creating and setting up SPF records.
Merging Multiple Senders into One Record
This is the rule that, when broken, causes the most problems: you can only have one SPF record for your domain. Period. Having multiple v=spf1 records creates a "permerror," which basically confuses mail servers and makes your entire SPF setup fail.
The fix is simple: combine all your include mechanisms into a single line of text.
Let's imagine you use GoDaddy Professional Email, a marketing tool, and a CRM. You'd have three separate pieces of the puzzle:
- GoDaddy Professional Email:
include:secureserver.net - A Marketing Platform:
include:spf.marketingtool.com - A CRM:
include:crm-spf.io
You do not create three different records. That’s a recipe for disaster.
Here’s how you’d see it done incorrectly, followed by the right way to merge them.
Incorrect – Separate Records (This Will Break Your Email)
v=spf1 include:secureserver.net -allv=spf1 include:spf.marketingtool.com -allv=spf1 include:crm-spf.io -all
This setup is guaranteed to fail validation checks. Instead, you need to bring them all together under one roof.
Correct – Merged Single Record
v=spf1 include:secureserver.net include:spf.marketingtool.com include:crm-spf.io -all
See how that works? Let's break down the anatomy of this perfect record.
| Component | Purpose |
|---|---|
v=spf1 |
This is the version tag. It must be at the very start of the record. |
include:... |
Each include points to a different approved sending service, all separated by a space. |
-all |
This is the "hard fail" mechanism at the end. It tells servers to flat-out reject any email from a sender not on this list. |
Notice there’s only one v=spf1 at the beginning and one -all at the end. All your approved senders are just lined up in between. This single, unified record is the secret to making sure all your legitimate email gets authenticated correctly.
Troubleshooting Common GoDaddy SPF Record Errors
Even when you think you've crafted the perfect SPF record, things can still go wrong. Seeing an SPF validation error is always frustrating, but the good news is that most issues are common and completely fixable. I've spent years helping people untangle these knots, and I can tell you that almost every problem boils down to a handful of recurring themes.
Think of this as your field guide for diagnosing and resolving the most frequent roadblocks you'll hit with your SPF record GoDaddy setup.
The Dreaded "Too Many Lookups" Error
Let's start with the one that trips up even seasoned pros: the "Too Many DNS Lookups" error.
Your SPF record has a strict, non-negotiable limit of 10 DNS lookups. This isn't a GoDaddy rule; it's built right into the SPF protocol to keep DNS servers from getting overloaded. Every include, a, mx, ptr, and exists mechanism in your record requires a DNS query to figure out what it means. The only exceptions are ip4 and ip6 mechanisms, which don't count because they're direct addresses.
It’s easy to see how this spirals. Each include you add is one lookup. But if that included service also has its own include statements (what we call nested includes), those count too. Before you know it, you’ve blown past the 10-lookup limit, triggering a "permerror" that causes many mail servers to simply reject your emails.
Fixing this means you have to "flatten" your record. It's a bit of a manual process, but it's essential. Start by auditing your lookups with an SPF validation tool to see the total count and which services are the biggest culprits. Then, take a hard look at your record—are there any old services you're no longer using? Get rid of them. In some cases, you might be able to replace an include with a direct ip4 or ip6 address, but only do this if you're certain those IPs are static and won't change.
The Problem of Multiple SPF Records
This is, without a doubt, the most common mistake I see in the wild. You can only have one SPF record for your domain or subdomain. That's it. If a receiving mail server checks your DNS and finds two or more records starting with v=spf1, it has no idea which one is the source of truth.
The result of multiple SPF records is immediate and absolute: your SPF setup is invalid. Servers will return a permanent error (
permerror), and your email deliverability will tank.
It’s a surprisingly widespread issue. Based on data from domain analyses, a staggering 41% of domains have been found with duplicate SPF records. That same data showed that 29% exceeded the 10-DNS-lookup limit. Together, these two fundamental errors are responsible for a massive number of deliverability problems, often silently undermining outreach campaigns.
Thankfully, the fix is straightforward. You have to find all your separate SPF records and merge them into a single, comprehensive TXT record. If you need a more detailed walkthrough, our guide on handling multiple SPF records breaks it down step-by-step.
This flowchart gives you a simple visual for thinking through the process.
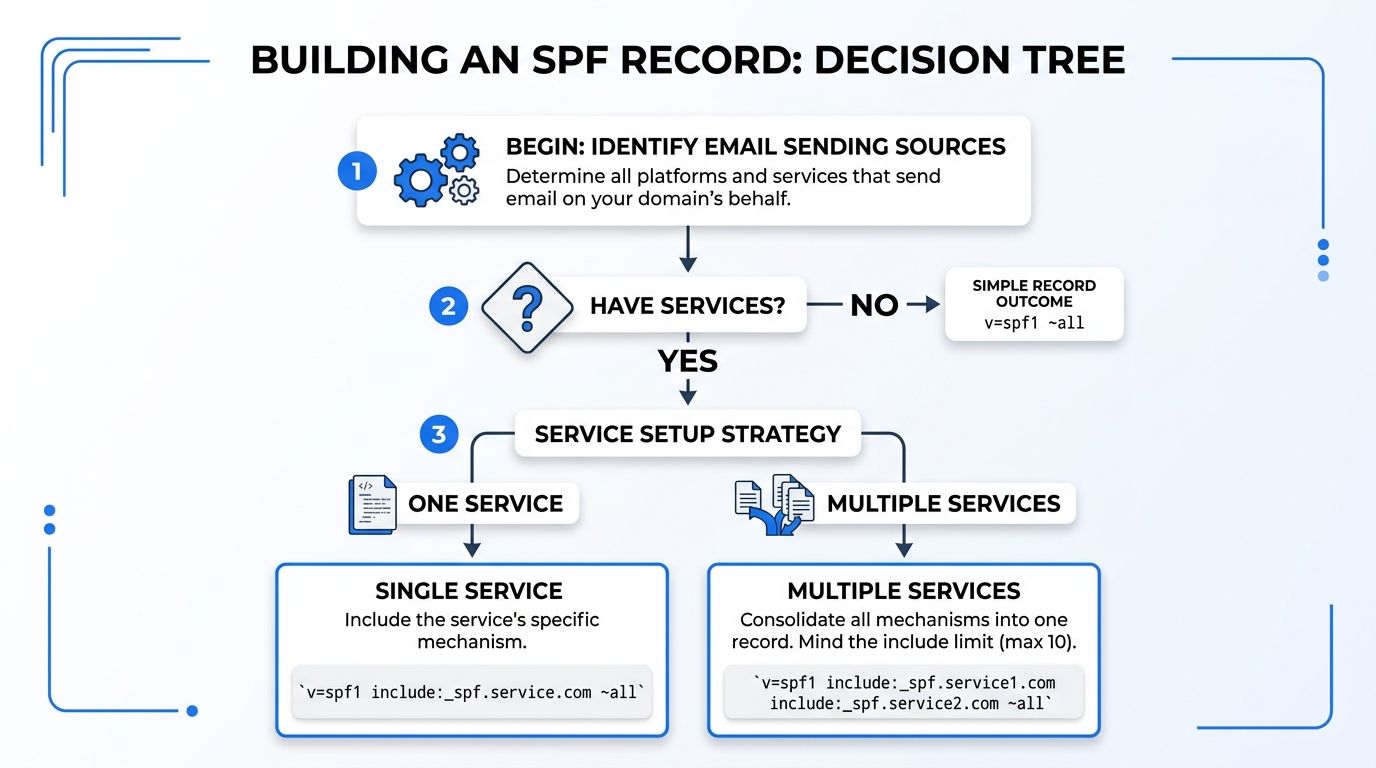
As you can see, the path forward really depends on whether you have one or multiple sending services. If it’s more than one, merging is non-negotiable.
For a quick reference, here’s a breakdown of the most frequent SPF issues I see on GoDaddy and how to sort them out.
Common GoDaddy SPF Record Issues and Solutions
| Problem | Symptom | Solution |
|---|---|---|
| Too Many Lookups | Emails are rejected with a PermError or SPF Permanent Error. |
Audit your record using a validation tool. Remove old include statements for services you no longer use. |
| Multiple SPF Records | SPF validation fails with a PermError. Tools show more than one v=spf1 record. |
Combine all mechanisms from your duplicate records into a single TXT record and delete the extras. |
| Syntax Errors | SPF check results in None or PermError, even with a single record under 10 lookups. |
Carefully check for typos, extra spaces, or missing quotes. Ensure the record starts with v=spf1. |
Invalid all Mechanism |
Your SPF check passes, but spoofed emails are still being delivered. | Make sure your record ends with an all mechanism, preferably ~all (soft fail) or -all (hard fail). |
Other Common Syntax and Logic Errors
Beyond the two big ones, a few smaller syntax errors can also throw a wrench in the works. When you’re editing your SPF record GoDaddy value, keep an eye out for these little details:
- Missing
v=spf1Tag: Every SPF record must start withv=spf1. No exceptions. It's the first thing a server looks for. - Incorrect
allMechanism: Your record needs to end with a clear instruction on what to do with unlisted senders. Forgetting to add~all(soft fail) or-all(hard fail) leaves your domain open to spoofing. - Typos and Extra Spaces: I've seen a single typo in an
includedomain or an errant space invalidate an entire record. Double-check every single character before you hit save.
By proactively looking for these common errors, you can turn what feels like a major technical headache into a simple, solvable puzzle. Taking a few extra minutes to audit your record for lookups, duplicates, and syntax will save you from days of deliverability nightmares.
How to Know Your SPF Record Is Actually Working
You've waded through the GoDaddy DNS settings, carefully crafted your SPF record, and finally hit that save button. It’s a moment of relief, but don't close the tab just yet. Publishing the record is a huge step, but the real work is making sure it's actually protecting your domain.
Think of it this way: you just installed a new lock on your front door. Now you have to jiggle the handle and give it a push to make sure it truly latched. We need to do the same for your SPF record, confirming it’s live, correct, and visible to the entire internet.
This final verification is what turns a hopeful guess into a solid fix. It’s how you guarantee all your effort pays off with better email deliverability and a secure sender reputation.
Using an SPF Record Checker
The fastest, most definitive way to check your work is with an online SPF record validation tool. These tools act as an immediate, unbiased second opinion, essentially mimicking how a receiving email server would see and interpret your new record.
When you get the results, you're looking for more than a simple green checkmark. A good diagnostic report gives you the full story. Here’s what I always look for:
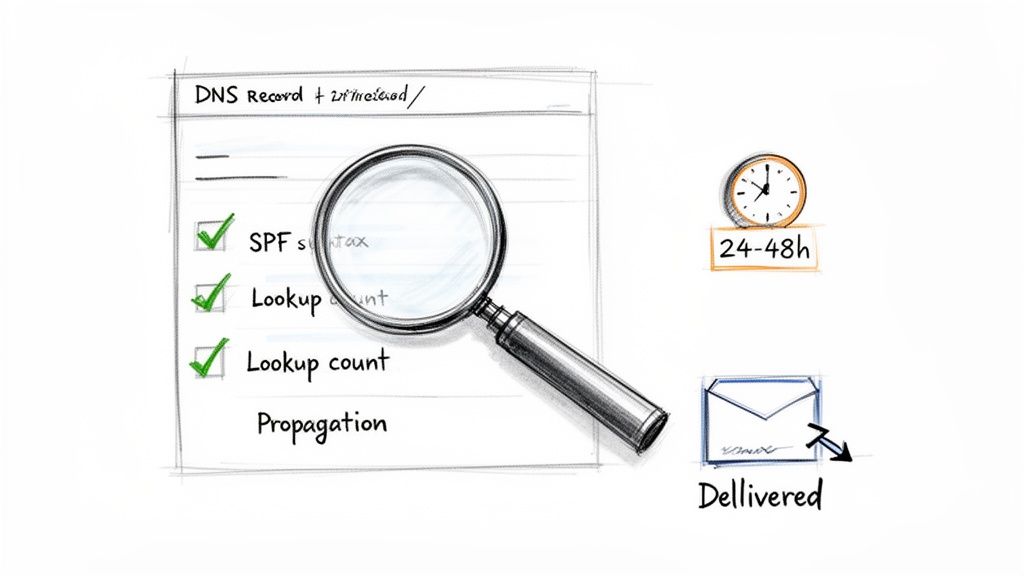
- Syntax Check: The tool instantly flags any typos, extra spaces, or formatting errors. It confirms your record starts with
v=spf1and ends with a properallmechanism, which is a common place for mistakes. - DNS Lookup Count: This is a big one. Your SPF record can’t require more than 10 DNS lookups. The checker will count them for you and throw up a red flag if you’ve gone over the limit. This is a primary cause of SPF failure.
- Record Display: It shows you the exact TXT record it found published for your domain. This lets you visually confirm that what you saved in GoDaddy is what the rest of the world sees.
If you get a "PermError" (Permanent Error), it means there’s a critical flaw in your record, like too many lookups or, more commonly, multiple conflicting SPF records. A result of "None" means the tool couldn't find an SPF record at all, which points to a different problem.
Understanding DNS Propagation
So, you saved your SPF record in GoDaddy, immediately ran a check, and… nothing. The old record is still there, or maybe the checker can’t find a record at all. Don’t panic! This is almost always caused by DNS propagation.
DNS propagation is the time it takes for your updated record to be shared across the globe's network of servers. It’s not an instant broadcast; it's more like a wave spreading across an ocean.
This delay is controlled by the TTL (Time to Live) value you set. GoDaddy’s default is often one hour, but it can sometimes take up to 48 hours for your new record to be visible everywhere. The best thing to do is wait. Grab a coffee, check back in an hour, and then a few hours later. If 48 hours pass and it's still not showing up, then it's time to investigate your GoDaddy settings again to make sure the change was saved properly.
Monitoring for Long-Term Health
Checking your SPF record isn't a "set it and forget it" task. It's a living part of your email infrastructure, and that infrastructure changes. A perfectly valid record today can become broken tomorrow when a new email tool is added or an old one is retired.
This is where continuous monitoring becomes essential. Using a service like Folderly keeps a constant eye on your DNS records. It will alert you the moment something is amiss with your SPF, DKIM, or DMARC setup, letting you fix deliverability issues before they ever affect a campaign.
For example, imagine your marketing team starts using a new email service without telling you. Instead of finding out weeks later when your campaign engagement plummets, you’d get an immediate alert that your SPF record is now incomplete. This kind of proactive oversight connects the technical task of DNS management directly to real business outcomes, ensuring your emails keep landing in the inbox where they belong.
Common Questions After Setting Up Your GoDaddy SPF
Alright, you've navigated the DNS settings and put your SPF record in place. Nicely done. But even after you hit save, a few common questions almost always surface. I've heard them all over the years, so let's walk through the final bits of confusion to make sure you're completely confident in your setup.
How Long Until My New SPF Record Actually Works?
You've saved your new DNS record in GoDaddy, and now you're refreshing your SPF checker every 30 seconds. I get it. But this is one of those times where you have to play the waiting game.
The delay comes from a process called DNS propagation. Think of it as the internet's global address book slowly updating itself, page by page. The speed is technically governed by your record's TTL (Time to Live), which GoDaddy often defaults to one hour. While I've seen changes go live in minutes, you can't count on it.
My best advice? Expect it to take a while. Your new SPF record might be visible to some servers almost immediately, but it can take up to 48 hours to be fully recognized everywhere. Just be patient and check it periodically.
What's the Deal with "-all" at the End?
That tiny all tag at the end of your record is the most important part. It's the bouncer, telling receiving servers what to do with any email claiming to be from you that isn't from an approved source.
You have two real choices here:
~all(Soft Fail): This is a suggestion. It essentially says, "This sender isn't on my list, so it's a bit suspicious. Maybe flag it as spam." It’s a weak signal.-all(Hard Fail): This is a direct command. It tells servers, "This sender is an imposter. Reject the message. Do not pass Go."
Honestly, for anyone serious about stopping email spoofing and protecting their domain's reputation, -all (Hard Fail) is the only way to go. It removes any ambiguity and gives you the strongest possible protection.
Can I Just Use an IP Address in My SPF Record?
Yes, and sometimes you absolutely need to. The SPF standard was built with this in mind, and it's a common practice for certain setups.
You’ll use one of two mechanisms for this:
ip4: For a standard IPv4 address.ip6: For the newer IPv6 format.
So, when would you do this? A classic example is an application running on your own dedicated server that sends email notifications. Instead of just an include from a third-party service, you can authorize that server's specific IP address directly.
Let’s say you already have a record for GoDaddy and another service. You’d simply tack on the ip4 mechanism. It would look something like this:
v=spf1 include:secureserver.net include:spf.anotherservice.com ip4:192.0.2.1 -all
This adds another layer of precision, telling the world that emails from that specific IP address are also legit.
Getting your SPF record set up is a huge first step, but it's not a one-and-done task. Your sending sources can change, and records can become outdated, silently tanking your deliverability. Folderly continuously monitors your SPF, DKIM, and DMARC configurations, giving you a heads-up before any issues can damage your sender reputation. Learn how Folderly can safeguard your email health and keep you in the inbox.

Previous Article
Łosoś wędzony na ciepło: przewodnik po smaku i jakościNext Article
Setup SPF Record GoDaddy: A Practical Guide 2026